Saturday, 8 July 2017
New Stamps.
Using one of the pieces of fabric printed with one of my water photos as an inspiration, I have carved four new stamps for possible use in the 'Ebb & Flow' imagery. I'm quite happy with the three horizontal bars, but the small stamp on it's own is a little bit out of scale. Still,the combinations and different orientations of the three stamps should give quite a good series of images.
Thursday, 6 July 2017
Moving Along............a Bit.
Since I couldn't work out quite where I was heading, and I knew that I wanted to use the cracked mud stamp that I had so laboriously carved, I printed on both of the pieces of fabrics that I'm considering using. Here I'm starting to print on the large piece of previous rusted and dyed cotton.
It's a bit hard to see in this photo, but the entire surface is now covered in 'cracked mud'.
I did decide to go ahead and stamp the silk, even though it didn't appear to be quite right initially.
Some of the fabric printed panels against the stamped silk. Definitely a possibility.
I've folded the strips of printed fabric into narrower pieces, and I think that although the pattern is diminished, it might be better with the smaller scale of the silk.
It's a bit hard to see in this photo, but the entire surface is now covered in 'cracked mud'.
I did decide to go ahead and stamp the silk, even though it didn't appear to be quite right initially.
Some of the fabric printed panels against the stamped silk. Definitely a possibility.
I've folded the strips of printed fabric into narrower pieces, and I think that although the pattern is diminished, it might be better with the smaller scale of the silk.
Wednesday, 5 July 2017
Another Idea.
After deciding that the mud coloured background was too much of a contrast to the water images, I tried the paper mock-ups against an old piece of dyed and backed silk that I have had siting around for a couple of decades. I definitely prefer the lower contrast, but if I print the cracked mud stamp over the silk, it's getting into the realm of surrealism colour-wise!
This is on another old piece of fabric, cotton this time that started out yellow, was rust dyed with various old bits of rusty metal (see the circular tin lid?) and then over dyed in green. There may be a bit of reddish dye used too, although I can't really remember. It might be a little too green, but much more interesting with the rust marks. I will have to avoid the circular piece though I think.
I wonder if I should dye the cotton a very pale turquoise, just to tone the green down a bit. I'll try the cracked mud stamp out on another similar fabric and see how it looks, maybe in the orangeish colour rather than the dark brown that I used on the Lutradur.
This is on another old piece of fabric, cotton this time that started out yellow, was rust dyed with various old bits of rusty metal (see the circular tin lid?) and then over dyed in green. There may be a bit of reddish dye used too, although I can't really remember. It might be a little too green, but much more interesting with the rust marks. I will have to avoid the circular piece though I think.
I wonder if I should dye the cotton a very pale turquoise, just to tone the green down a bit. I'll try the cracked mud stamp out on another similar fabric and see how it looks, maybe in the orangeish colour rather than the dark brown that I used on the Lutradur.
Tuesday, 4 July 2017
Where to Next?
I printed out the various water patterns onto paper, so that I could cut them up and move them around rather than using the expensive commercially treated fabric versions. First, I cut them all narrower and shorter, placing them on a plain painted background of Lutradur. I do intend printing this piece with my cracked mud stamp eventually, but it's early stages yet. Seven different patterns is definitely too many.
Hmmm, six is better, but nothing about the work grabs me just yet.
Definitely better over the cracked mud print, but still nothing is working.
Cutting the patterns into puddle shapes is better.
Overlapping the cracked mud sheets and extending onto the plain piece.
A staggered layout is more appealing, but I still don't like it at all. I think that the contrast between the cracked mud and the water is too high perhaps......................back to the drawing board I think.
Hmmm, six is better, but nothing about the work grabs me just yet.
Definitely better over the cracked mud print, but still nothing is working.
Cutting the patterns into puddle shapes is better.
Overlapping the cracked mud sheets and extending onto the plain piece.
A staggered layout is more appealing, but I still don't like it at all. I think that the contrast between the cracked mud and the water is too high perhaps......................back to the drawing board I think.
Sunday, 2 July 2017
Most Unusual!
Being so close to the city we don't usually have frost, well at least not for many decades, but after a particularly cold night last night, we had frost.
The frost on Pin Oak leaves is very 'foreign' looking, but rather pretty.
Saturday, 1 July 2017
Testing, Testing, Testing.
To continue with my cracked mud and water project I wanted to use some of my own photos of various patterns that I had observed on water. However, I first had to determine which material took the print best, so I started out printing on silk fabric that I ironed onto some freezer paper. The colours were very pale and the edges of the paper curled up during printing and almost jammed in the printer. You can see some black ink on the lower right hand corner. Not the best outcome really.
This time I printed on some Lutradur that had been sealed with gel matt medium. Better, but still not what I was looking for. The colours are brighter than on the silk, but not bright enough.
Now some comparison with silk, Lutradur and some commercially treated fabric designed to use in a domestic printer. The middle sample is the fabric.
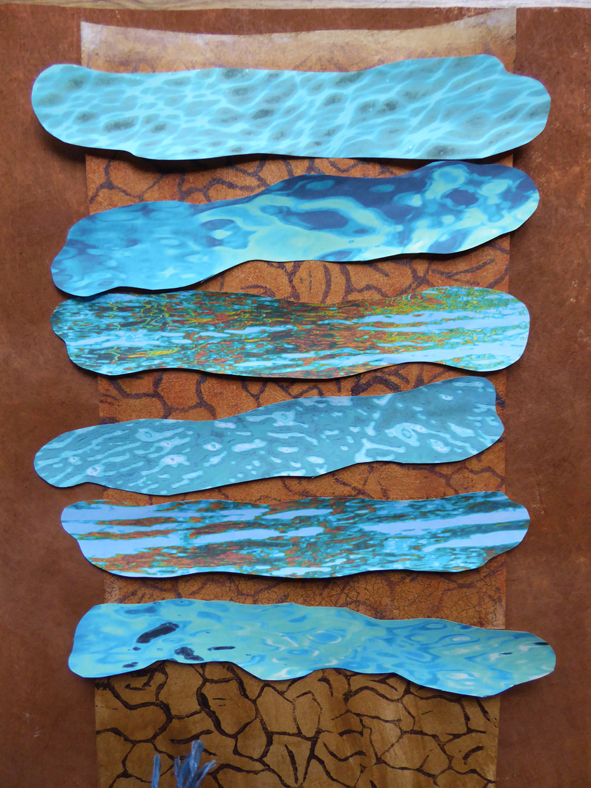
It would appear that the treated fabric gives the best result for my purposes. Here are 2 more water patterns with one of the earlier ones.
Now I have 6 different water patterns printed onto fabric to play with against the background of the cracked mud. I might need to make another one however to continue the orange colour that is in the lowest piece here and will show in the cracked mud background. The actual samples are much more green than they show here, sort of a turquoise colour rather than pale blue.
This time I printed on some Lutradur that had been sealed with gel matt medium. Better, but still not what I was looking for. The colours are brighter than on the silk, but not bright enough.
Now some comparison with silk, Lutradur and some commercially treated fabric designed to use in a domestic printer. The middle sample is the fabric.
Now I have 6 different water patterns printed onto fabric to play with against the background of the cracked mud. I might need to make another one however to continue the orange colour that is in the lowest piece here and will show in the cracked mud background. The actual samples are much more green than they show here, sort of a turquoise colour rather than pale blue.
Saturday, 24 June 2017
Cracked Mud.
Having removed more of the 'cracks' in the mud that I thought made the image too busy, I decided to go ahead and make a print on the painted Lutradur that I intended using for the final art work.
The piece of carving block is quite big, 21 cm x 15 cm, so I only needed to make 2 prints to fill up the A4 size piece of Lutradur. I reversed the orientation of the block for the second print and overall I was very pleased with the result. I bit too many scrapes of the carving tool showing, but I can easily remove them before the very final piece.
Friday, 23 June 2017
The June Flower Completed.
I've added some white highlights to the petals as well as the final touches to the central area. I tried out some of the green beads that I had, but either they were too small, too large or not quite the right colour, and I didn't want to go out and buy yet more beads, so I'll make do with these green fabric cut-outs.
Backing on and the edges sealed with satin stitch.
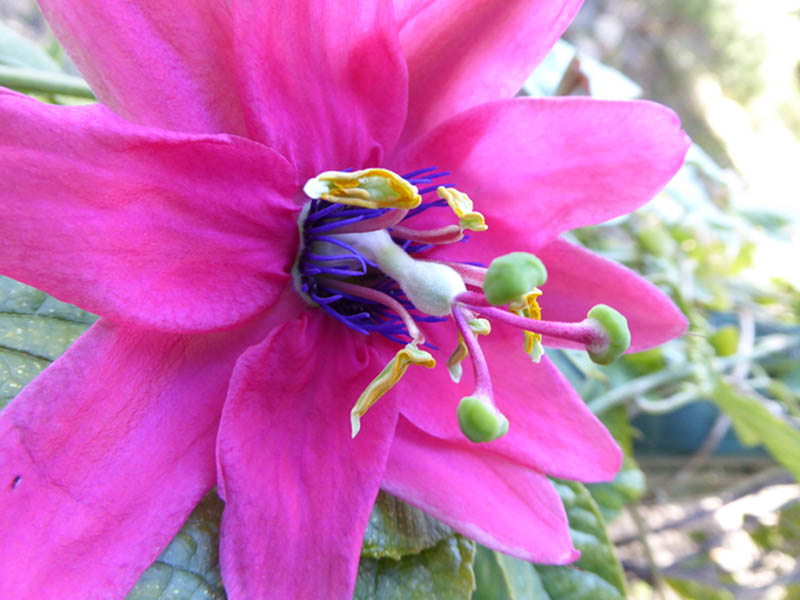
The original Passion flower.
Backing on and the edges sealed with satin stitch.
The original Passion flower.
Subscribe to:
Posts (Atom)